Saturday, February 23, 2013

How to Germinate Seeds

It's seed starting time in the Givler Garden.  I've already potted tomato and flower seeds.  It seems the right time to write a post about my germination process.
I start with packaged potting mix and seed starting mix.  Any brand of potting mix will do, but I really prefer Jiffy seed starting mix over all other seed starting mixes.  You might wonder why I need potting AND seed starting mix.  It's because I'm cheap.  Seed starting mix is fine-ground stuff, and because it has to be ground up more, it's costlier.  I use potting mix on the bottom of each pot and seed mix on the top, where the seeds are.  Duh.
The most common container I use are these 4-cell plastic ones.  I like them because they aren't too small, so I don't have to transplant to larger containers later on.  I've had huge success using them for tomatoes, from germination to direct planting into the garden.  However, anything that will hold mix and allows water to drain out will work.  My second favorite container are actually toilet paper rolls.  Packed tight in a large container (with drainage holes), they are fantastic...free, allow for lots of root growth, and can go in the ground with the plant for minimal trauma.
 I moisten my mix in the bag.  I slice open the top of the bag, and pour 2-3 pitchers of water in.  Let it sit overnight, and in the morning you've got nice wet mix.  Pouring dry mix into cells and then trying to get it moist sucks.  Save time and pre-wet your stuff.  I fill the cell 2/3 with regular potting soil, and the upper 1/3 with seed starting mix.
 I make some holes in the top of the seed mix.  Not deep, just a little depression to catch seed.
 Drop 2-4 seeds into the depression.  One is not enough, because you want a plant to grow in each cell.  Empty cells mean wasted space and water down the road.  Not all seeds will germinate.  So, hedge your bets and put in extra seeds.  If multiple plants grown, you just trim the unwanted seedlings at the soil line.  Game over.   Once the seeds are in, flick a little of the mix over them, and press down with your finger to ensure that the seed is touching mix on all sides.
 At this point, I tear off a rectangle of clear plastic wrap and put the filled pot on it.  No name brand wraps either.  Only the cheap store brand stuff will do.
 Even though I'm using moist mix, I add a splash of water to each cell at this point.  I want this stuff dripping wet.  No water, no germination, no seedling.
 I add a little sign so I have a clue about what this it later when there are 500 plants growing in the greenhouse.
Then I wrap it up and put it in a sunny place in the greenhouse.  Once I see green through the plastic, I unwrap it.  However, until then, the plastic guarantees that the mix will be at the perfect moisture level for germination.  All you need now is sun and warmth.  The rest is up to the seeds.


Monday, January 14, 2013

The Monster

A monster has been growing in my garden for 9 months.  Planted last spring, he's been slowly adding layer upon layer of flesh to his swollen body, sucking up nutrients, pushing his roots deeper into the soil.  He's outlasted all of his brothers and sisters.  Some think he ate them, too...or perhaps absorbed them through some sort of evil reverse-mitosis.  Finally, we put a stop to his crimes against vegetables.  We pulled him.
The plant in the picture above is ONE beet.  It was probably 5 pounds before trimming.  I wasn't especially hopeful about getting edible food from this mega-root, but I made the attempt.  I boiled it...

After boiling, I could just rub the outer skin off.  There was a thin layer of sweet-flavored pink flesh (doesn't that sound appetizing?), but the interior of this mammoth was not edible...it became a whitish color, tasteless and grainy.

I'm still stoked about growing such a huge mutant plant.  There's a radish out in the garden right now that is, proportionately, almost equally massive.  But that's a post for another day.

Monday, December 3, 2012

4 steps to get salad in December

Saturday evening, December 1, we had a salad with supper, and 100% of it was picked about an hour before the meal in the Givler Garden.  It had purple lettuce, mustard and radish leaves, diacon radishes, sliced celeriac root, and carrots.

So how do you get a fresh home-grown garden salad in December?  The truth is that it's not hard...
1.  Plan for it.  In March, after I'd planted my early seeds, I made two piles with what was left, one for a late-spring/early summer planting and one for a late summer/early fall sowing.  Crops that love heat were in the summer pile, and crops that tolerate cold well were in the fall pile.  If you want to put out seeds late in the season, you must already have them in hand, as those pretty little seed packets are nowhere to be found for sale in August and September.
2.  Re-sow your garden early and often.  Have a hole where spinach didn't germinate?  Pop in some onions, or toss in some marigold seeds.  Harvest all your bush beans or radishes?  Put in new seeds...preferably something from a different plant family so they will be sucking a different mix of nutrients from the soil.  Crop rotation also helps keep the insect pests baffled.  Don't forget to add compost when you re-plant.  Leaving chunks of the garden empty doesn't make sense to me.  If you want to give it a break and improve the soil, plant a cover crop that you'll chop back into the soil before it goes to seed.
3.  Know how much time you have.  If your expected first frost is October 31, and it's August 31, then whatever you plant needs to mature within 60 days, or you need to be able to eat it young and immature.  It's also a good idea to plant cold-hardy vegetables.  I've had success with kohl rabi, collards, arugula, mustard greens, radishes, swiss chard, carrots, lettuce, and celeriac.
4.  Fool the frost.  We've been very lucky here in Central Virginia this year with a mild winter.  The first frost arrived on-time, but we've only had a couple heavy frosts.  I think the coldest overnight low so far has been 26 degrees.  If your forecast calls for a serious overnight cold spell, don't fret...just cover those plants.  A clear plastic sheet, secured on either side of the row, does the trick for me.

Leaves piled over the live plants works too.  Using both of those methods, you'll need to go uncover them the next morning.  Other, more permanent ways to extend the season include hoop houses and cold frames.  I haven't tried those, since the greenhouse meets most of my winter gardening needs.  However, a great book about extending the harvest using those and other methods is The Year Round Vegetable Gardener by Niki Jabbour.  I found it at my local library, and it's full of good tips and ideas.  Niki's blog about gardening in Nova Scotia is a good read as well.  Clearly, if she can have fresh salads during the snowy Canadian winter, mere mortals like me can pull it off in balmy Virginia.

Advice needed...I have a ton of is collard greens, and I need a new recipe.  We've got the deep-south, cooked with smoky pig parts and vinegar style collard greens down pat.  Anyone have another tasty way to cook collards?

Tuesday, November 20, 2012

Leaves and Leftovers

This weekend was clean-up day for the garden.  Plants killed by frost were ripped out and added to the compost.  Tomato stakes were pulled and put away for the winter.
After all the removal, we still have a lot of edibles available.  The list includes green onions, beets, red leaf lettuce, swiss chard, celeriac, arugula, collards, New Zealand spinach, kohl rabi, mustard greens, and radishes.  These garden leftovers should make some tasty stir-fry and salads over the next few weeks.
Everything left has survived a couple hard frosts.  These guys are tough and hardy.  Once the garden inventory was complete, it was time to tackle leaves.  Everyone helped, and placed the leaf harvest in the garden.
I spread the leaves in the troughs between the seedbeds, and stepped on them to compact them in and keep them from blowing around too much.  My hope is that they will decompose some over the winter, turning into leaf mold that I can till into the soil.  This was the first raking.  There will be more leaves.

Thursday, November 8, 2012

Frost

Planting in late summer for an autumn harvest is a great way to extend the gardening season and keep putting tasty stuff on the supper table.  Here in Central Virginia, first frost generally hits at the end of October, so as long as you can count backwards from that average frost date, and only put in things that can mature in time, you can squeeze in a second growing season.
In this recent harvest, the green beans and the sugar snap peas are from plants grown from seed that went in the ground in late August.  I planted about a fourth of the garden with relay crops then, and put down clover as a cover crop a little later.
Clover is in the foreground.  Starting on the right and working to the left, you can see New Zealand spinach, collard greens, arugula, snap peas, and my Kentucky Wonder bean tepee, which produced all summer and fall.  Green beans are killed by frost.  Peas are hardier, as are the cabbage family greens like collards and mustard greens.  Earlier this week, a hard frost hit.
This was the first frost we'd had.  It was 29 degrees Fahrenheit that morning.
It was cold enough for ice to form in the top of these buckets of water.
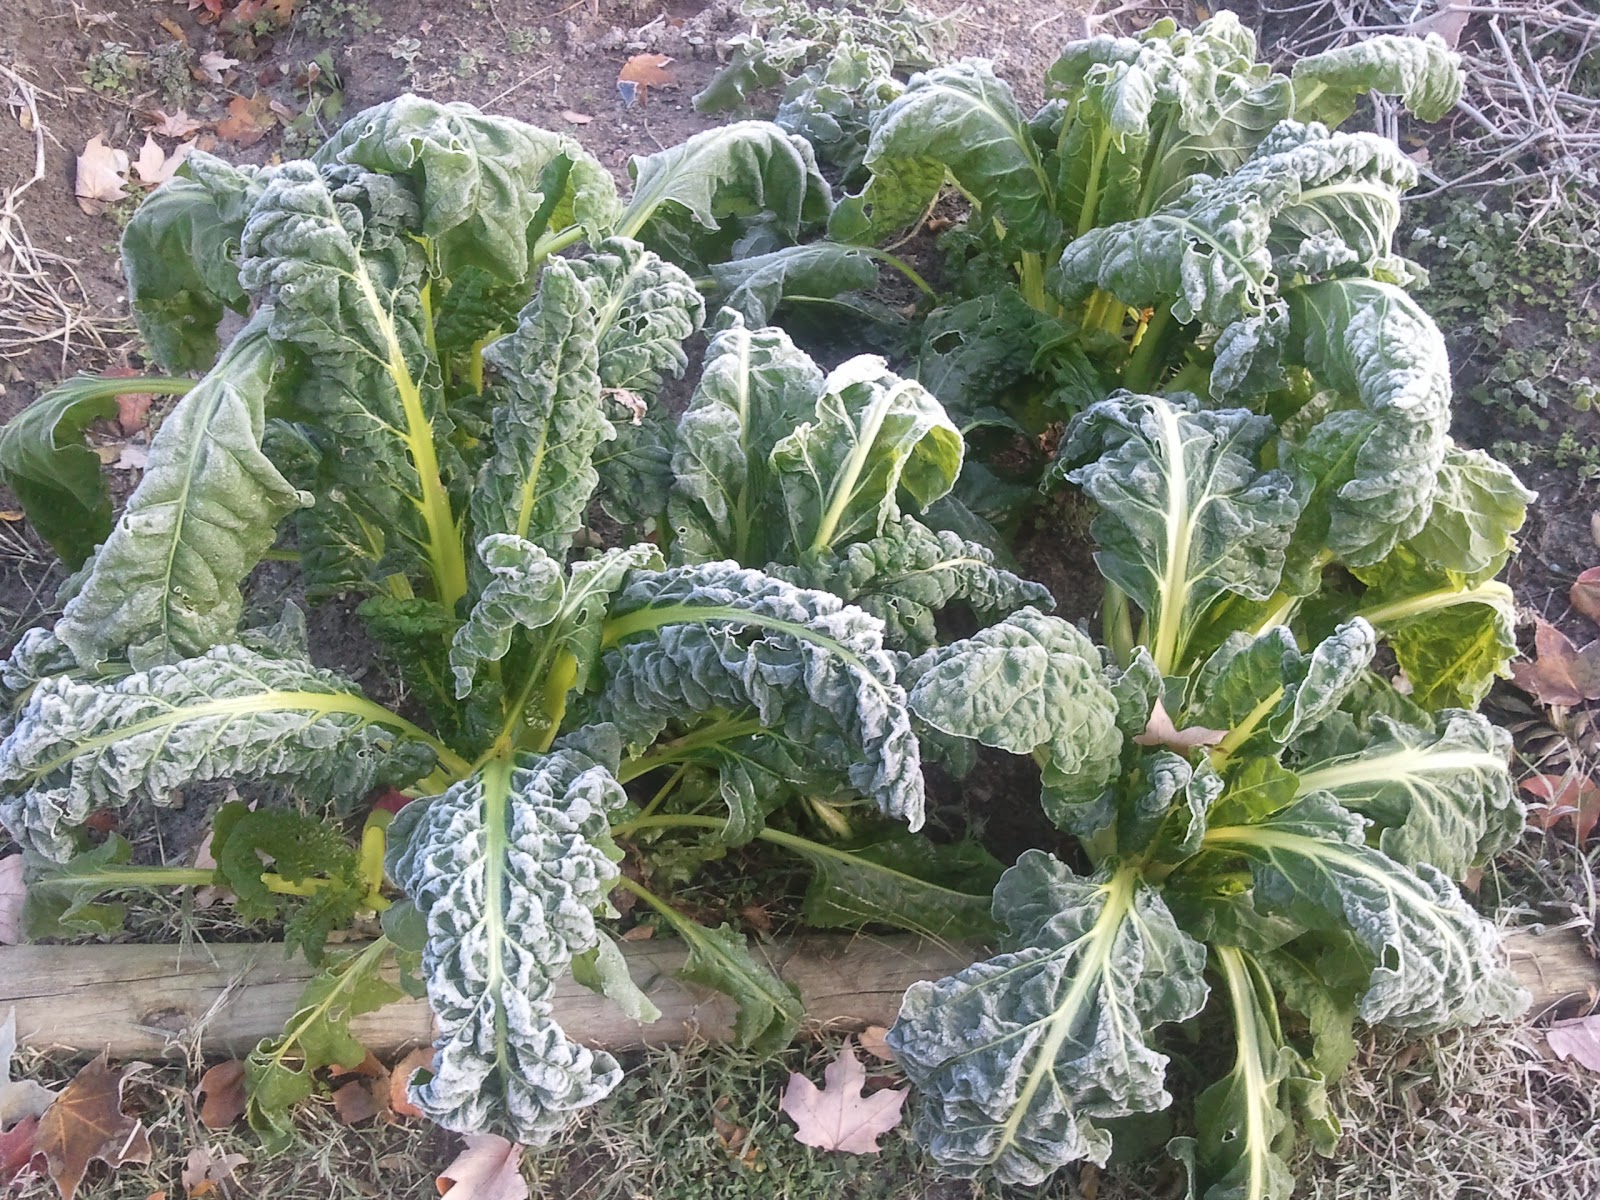
These collards look frozen, but they defrosted and perked right back up.  The most important thing is to not pick anything while it is frosty, or you'll wind up with a pile of goo in your basket.  Let them unthaw, and then pick.  Interestingly, frost exposure generally alters the flavor of most vegetables for the good.  Root crops get sweeter, and leafy greens get tastier.
Our Swiss Chard, another August planting, appears totally defeated by the frost.  However, just like the collards, they warmed up and are doing just fine.  Chard is extremely cold hardy.  I've read that it can survive in snow.  Perhaps we'll find out first-hand.